Little Adventures · Uncategorized

Littles Explore Budapest

Over the weekend some of my Littles got to come with us on a weekend trip to Budapest. We live in Southern Hungary now, but spent many years in the capital and grew to love it deeply. It’s one of the most beautiful cities in Europe and having it as a backdrop for some Little Adventures is hard to resist. Funny thing is, I’ve taken Littles with me on several visits now, but those photos have somehow never made it onto this blog – I’ve shared some on Instagram, but never created a full blog post. And so – with this post I’ve decided to combine several visits with various Littles and give you a mini tour of Budapest. Not exactly a cohesive ‘story’, but I hope you enjoy the pictures and maybe learn a little about a favorite city!


This past weekend Minerva and little Remy Applewood took an exciting trip to visit with one of Minnie’s dearest friends – Aria Flora, on Castle Hill in Budapest. Aria also got to do some sightseeing as we played ‘tourist’. Castle Hill is on the Buda side of the Danube river, which divides Budapest, with the hills of Buda on one side, and the flat lands of Pest spreading out on the other. Old castle and city walls still surround a small and historic neighborhood at the top of Buda. Castle Hill is dominated by the old castle grounds and buildings, one of the largest is now a Fine Arts museum plus the famous Matthias Church and Fisherman’s Bastion. But there are also apartments and private homes, though the small area can become congested and clogged with tourists. I admit, I’d planned to take more pictures than we ended up getting, because there were many more tourists than I’d expected in early March, admittedly on a lovely sunshiny Sunday.

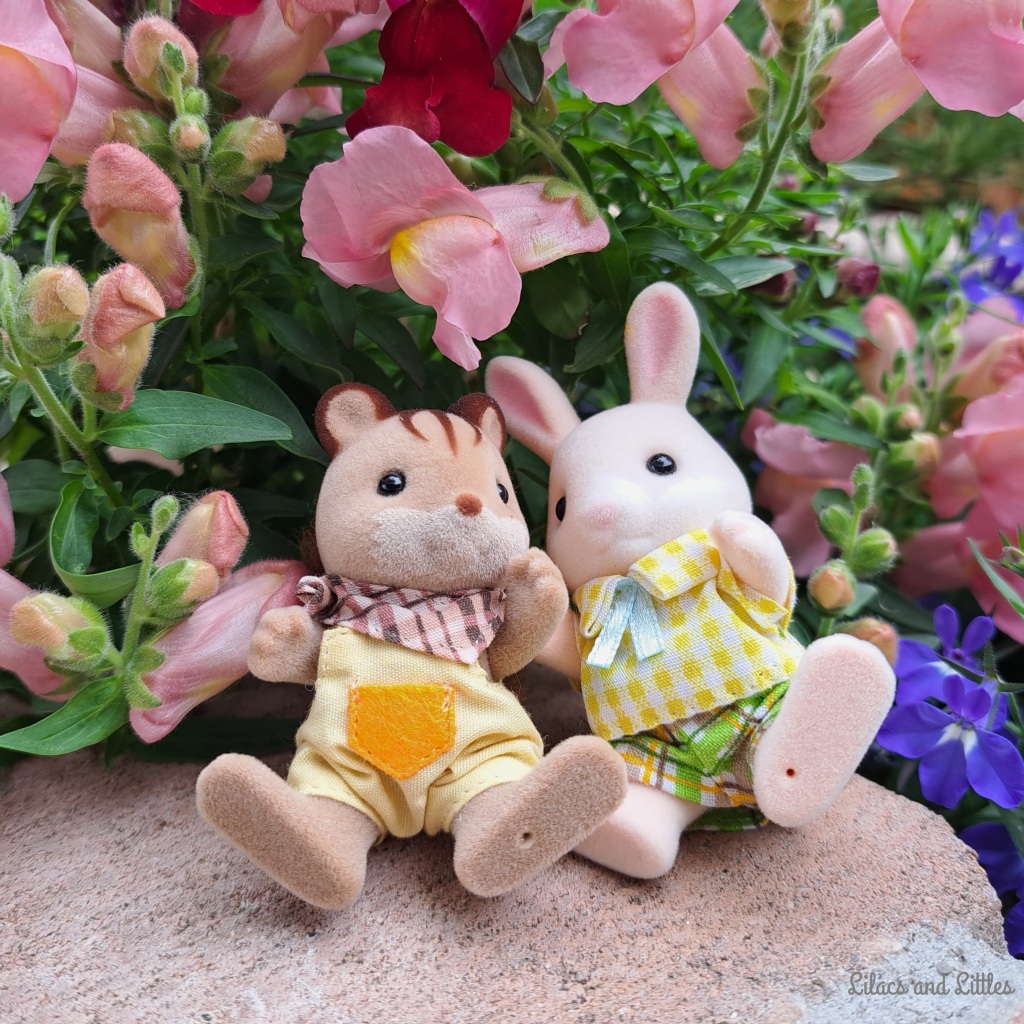
Minnie and Aria greeted each other happily at the top of the Varkert Bazar, a zig-zag colonnade with gardens at one end of the bottom of Castle Hill. It’s a lovely entrance to the historic district, complete with a new escalator going up for some portions, plus an elevator option. We were living in Budapest as the Varkert was renovated, after sitting in ruins since WWII. But the beautiful location was secondary to these dear friends seeing each other again – plus, Aria had not seen little Remy since he learned to walk this winter, so he got to happily demonstrate his new-found maneuverability. Behind them you see the famous Chain Bridge, the oldest of eight bridges linking Pest and Buda.


Aria enjoyed the grounds of Buda Castle and we were both thrilled by the blooming Hellebore, or Lenten/ Christmas Rose. I may be adding some to my garden this year! And we found a quiet section of the castle with empty guard booths near a back entrance while all the tourists crowded to watch the changing of the guard around the corner. The Matthias Fountain also greatly impressed Aria, and it is impressive! Though, the view is always hard to beat – with a closer look at the Chain Bridge, while the red pointed roof of Parliament sits up river beyond it.


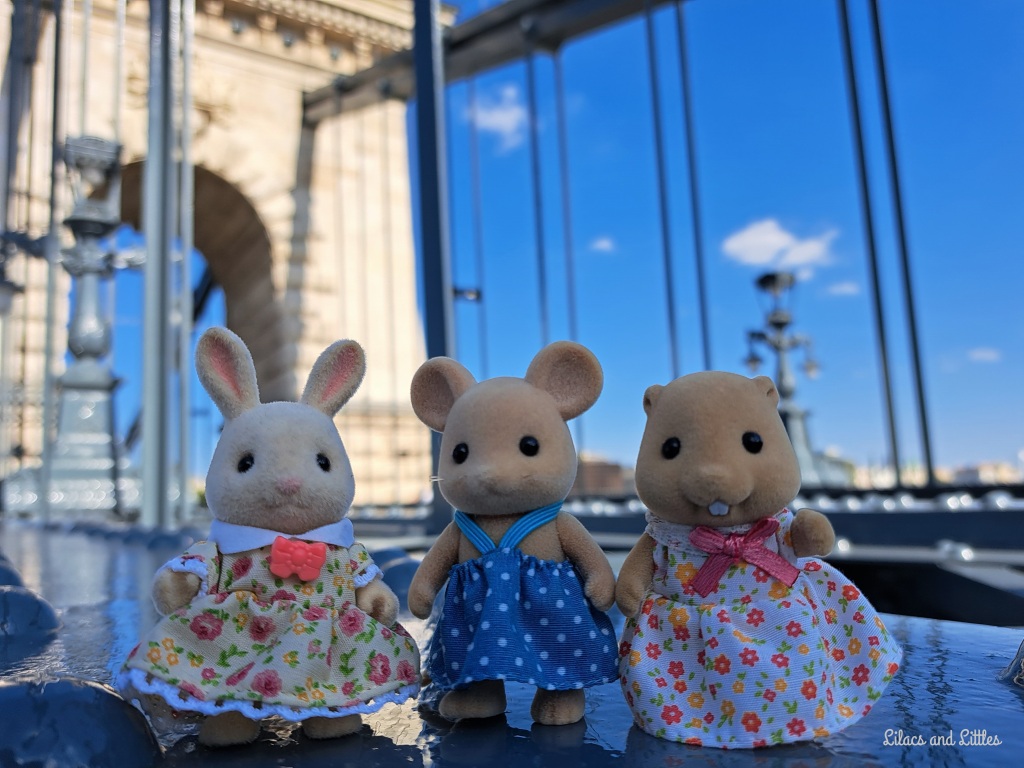
This past summer the Chain Bridge re-opened after being closed for renovations for a couple years, and during a visit in August we did the mandatory walk across to explore it up close and in it’s shiny renovated splendor. Rebecca Periwinkle, Geri Applewood and Misty Waters came along for that day’s adventure.


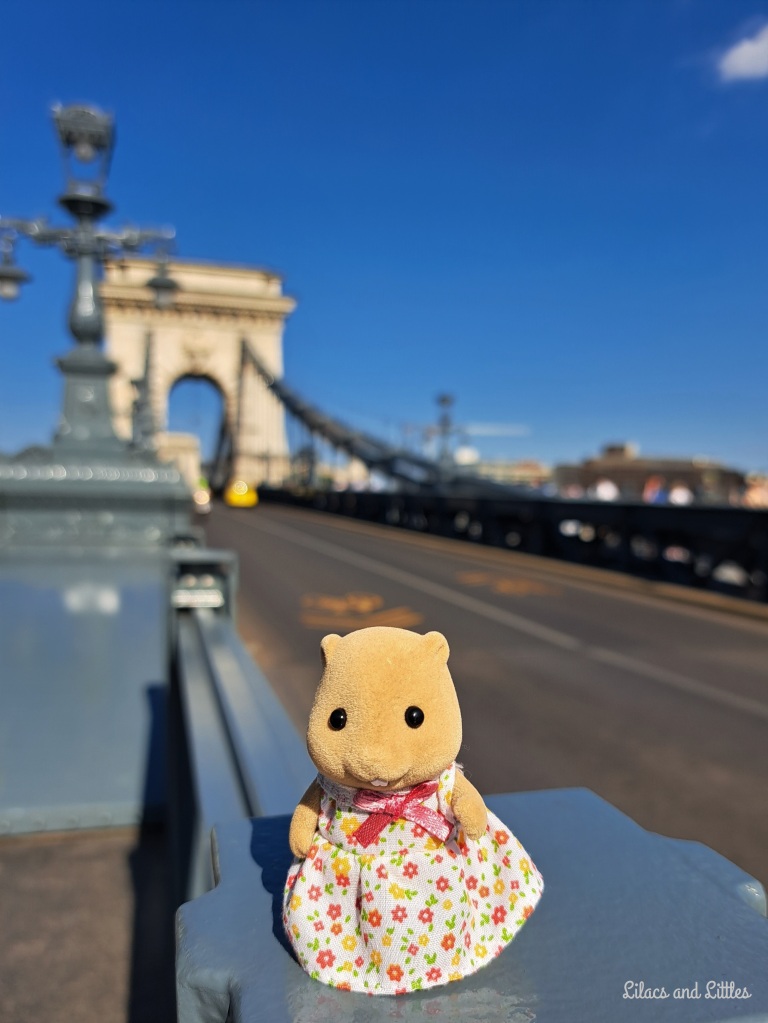
After crossing the Chain Bridge I was very excited to introduce the girls to an old friend, nearby and just their size! The artist Mihály Kolodko has created many miniature bronze statues that can be found all over Budapest. They’re really tiny, and often placed in obscure locations – so finding them is like a treasure hunt! One of our favorites is Főkukac, a character from an 80’s cartoon that my Hungarian husband grew up watching, A Nagy Ho-Ho-Ho-Horgász. He was the always positive little worm friend of the main character, a fisherman. Little Főkukac is along the Buda side of the river, not far from the Chain Bridge, walking towards Parliament. Geri, Rebecca and Misty loved getting to meet him!

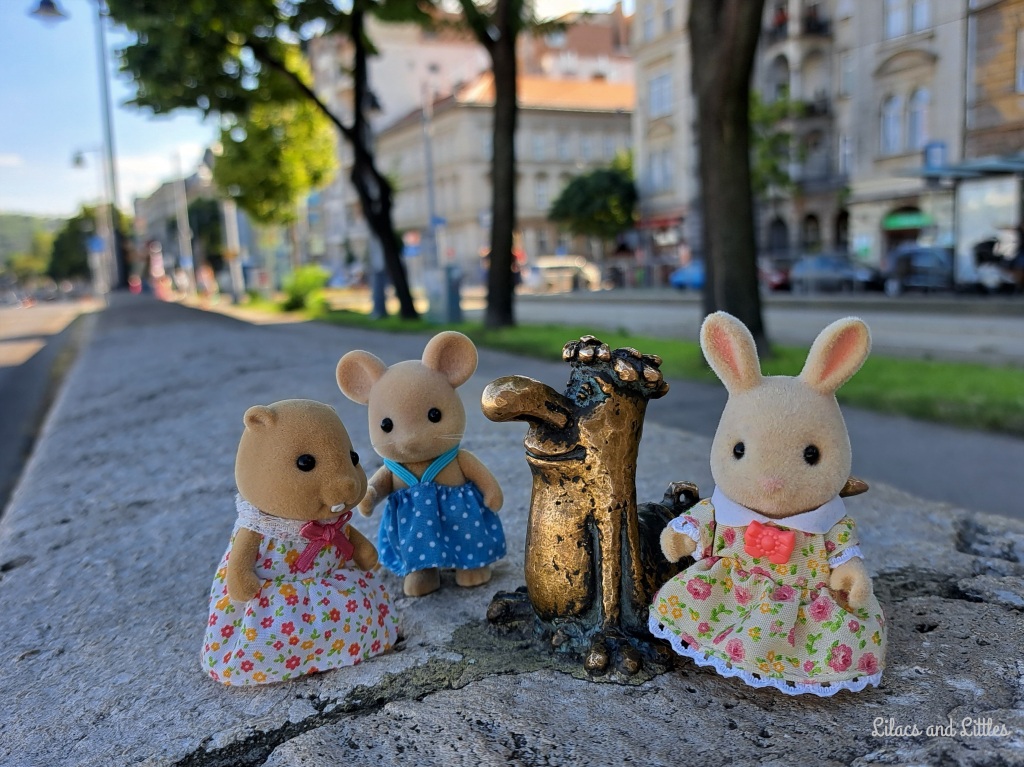
The girls and Főkukac became fast friends, so much so that Misty didn’t feel odd about asking to go for rides on his back – to which he happily consented. He was especially interested in how the shiny Chain Bridge looked up close, as he’d been watching the renovations from afar for so long. And then they all sat and just soaked in Főkukac’s daily view, their new friendship cemented enough to just enjoy each other’s company. Just the other day Geri was asking me if they can visit Főkukac again, both Rebecca and Misty joining in – plus many other Faunavale citizens who have heard the girls talk often of their favorite day in Budapest when they met and made such a special friend, just their size.


And last, as it happened the longest ago – Lisa Margeurite came along on a shopping trip last spring. She was mostly helping me find appropriate sized plastic flowers at Ikea, but I did manage to let Lisa experience our personal favorite view in Budapest. Our old apartment was near the Margit Bridge, and we walked across it regularly, often stopping to boat watch and wave at tourists on cruise ships. You got a glimpse of the parliament building in the distance, but from the Margit Bridge it’s spectacular. Lisa was rightly impressed and I really need to keep my promise and take her back to see more of the city, though she also enjoyed Ikea, as one does.


I hope you enjoyed this Littles Tour of Budapest, Hungary!

Buckley Deer's Cedar Terrace · House Remodels

The Buckleys Expand – New House and New Babies!


The approaching arrival of a new baby can often be that final push toward upgrading to a new and larger home. While I don’t advise moving while pregnant, the truth of the matter is that I think it often happens. We were still walking around boxes and getting fully unpacked while also dealing with our first baby so many years ago, our son and his little family are preparing to do the same. So when I began working on the renovation of Cedar Terrace / The Three Story House for the Buckley Red Deer family, and then knew they would be growing by the arrival of twins, I had to just laugh. Of course their family was getting bigger, they were getting a new home!

The Buckely family was one of the first families I actively searched for, and in so doing discovered all the older, vintage families I’d not known existed. Wanting a ‘forest animals’ theme for Faunavale, and also being a huge fan of Thumper and Bambi – I had so many rabbits so quickly that it was only natural I look for some deer. I gave in fairly quickly and ordered my Buckley family from Japan and they were soon an integral and favorite part of my Littles’ world. And as we do, I wanted them to have some babies too. These were easier to find online and so I didn’t worry or feel rushed to buy them before inventory would deplete. I began working on their home, assuming it would be finished long before I’d order the babies. I was wrong.

I purchased my Cedar Terrace used, with some markings already on it and always knew I’d give it a complete paint job. Much more than just the window trim and brick work I’d already done on previous houses. First time passed as I decided on the base color but could not find any paint in that shade – sage green. I was worried, with a first such job, that I’d not be able to create the right amount or be able to mix up multiple attempts and get the same shade again, so I really wanted it already mixed for the wall colors. I finally found some sage after a long stall in painting. And now much time passed as it took SO many coats to come out as green, not a soft blue. I was used to applying two, maybe three coats. For the sage green walls, I ended up doing five coats. And so my friends – learn from my mistakes again – for light colors, go ahead and use a white primer. Or be prepared for lots of coats!


It also took more time than I was anticipating because there were just so many layers, with the time-consuming job of applying masking tape over different parts – but not until the previous paint job had fully dried. But that was also part of the fun! This house has so many lovely details that I so enjoyed pulling out – especially the rows of flower ’tiles’, the pretty shutters on the sides and the timber frames. I researched old timber-framed houses, as I had it in my head that most had just white walls, but was relieved to find many in various soft colors too, so felt okay in using the green I wanted. It’s really a darling house and my favorite outside renovation to date.


But, you’re wanting to know – did I finish it in time for the Buckley babies’ arrival?!

Not exactly….but almost! The outside has been finished for some time now, but I’m just finally getting the final touches done on the inside. Still, it made a lovely backdrop for a touching family meeting time, as Agatha and Rupert introduced big siblings Maria and Freddie to their new baby sister Lily and brother Matthew. Maria had been so excited, while Freddie a bit more unsure about the coming babies. Thus Agatha was relieved and thrilled when Freddie asked if he could feed tiny Matthew his bottle, and he did such a good job. The older Buckley kids are well on their way to being fabulous big siblings.


It feels so fitting to have new babies to show off, as I reveal the new Cedar Terrace, because these houses sort of become my babies. I’ve been itching to show off this one, but knew I wanted it fully finished first! Stay tuned in the coming weeks to see each of the interior rooms. Agatha and I are especially excited about the ground floor room, our favorite.

DIYs

No-Sew Options to Keep Your Littles Warm in Winter


Last winter was my first full winter since I entered this adorable world full force, and it concerned me to have my Littles running around in their summery dresses, mostly all short sleeves, some no sleeves at all. Being a mother, I had that very motherly reaction and got cold just looking at them. I didn’t have much at my disposal, but I did manage to wrap lots of little scarves around necks. And I made the fun discovery that the pre-made knit hats available in many places online plus in some craft stores, did indeed fit on their little heads – and you CAN cut careful holes for ears and the hats don’t fall apart. That was a useful bit of knowledge and combined with the scarves I didn’t feel so cold anymore.

Some of my Christmas Scenes from 2022 – notice the scarves, hats and babies bundled up to stay warm:


Ah, the best laid plans of Bunnies…. I had all these big ideas last winter, expecting to start work on making actual little coats and some other styles of hats long before winter, maybe by early fall. Ha ha ha ha… sigh. Instead I had a rough summer, began to recover and then got smacked with an even worse October & November. So there I was, entering December with my Littles in their summer-y best still, and I couldn’t even find my bag of their hats from last winter. But I was starting to feel much more myself and having more and more energy and desire to create something for them, but what could I do with so little time before my own mental schedule of ‘by Christmas’? Enter another dear creative lady I’ve never met, but love following on a Facebook Group – Joanna shared the simple coats she’d made with felt and ‘no sewing necessary’. I was inspired and set to work.

Pardon the background mess in some of these next shots – but hey, real life and my real desk most of the time. I made these first, simple coats in one afternoon. The felt acts as a light velcro-like fabric, when combined with the folded down collar can keep the coats closed and in place without any need of clasps, buttons, etc… Some styles of felt works better than others. I played around with the shapes, the sizes of collars, the width of the fronts, straight edges and curved. I also modified each coat for their owners, giving some tail slits, some tail holes. Joanna, and I, also used belts and scarves to keep some closed. My first designs:


I gained confidence and felt ready to take and share some step-by-step pics by the time I was working on Nancy Waters’ pretty green coat. Misty and Bucky watched on, already wrapped up warm in their new coats.


I used an earlier made coat as a template for several more. Starting with a rectangle of felt, measuring 12 centimeters by 5 1/2 centimeters or 4 3/4 inches by 2 1/4 inches, I placed the template on top for arm-hole locations, pulling up the felt a bit with my pencil tip. I later realized I can use chalk to mark on dark fabric – duh, I knew that old trick. But if you forgot it like me, a pencil pulling up the fluff from the felt works too. I folded the fabric over the hole spots in each direction and carefully snipped two cross lines – a sharp and pointed scissors works best for this, but you can also snip carefully with any scissors, just cut small and slow.


You can then have your Little try on their coat, get a feel for how it fits them and decide how you want it trimmed – I left it straighter on some coats, but curved the edges for all the Waters’ coats. For curving the edges, fold the coat in half and trim both sides together so they match. Scroll back up to see some examples of coats with straight edges. The grey coat on Mr. Dappledawn is untrimmed and straight on all corners. I left the bottom edges straight for all the men’s coats, but did trim most of their collars with a curve. Try various combinations and see what you like best, or ask your Littles which they prefer. You can also determine a tail hole at this point, or maybe a long slit. Again, see the photo above with four different tail options. For a round hole, fold and snip from both directions just as you did for the arm holes. I opted for a long slit for Nancy’s wide beaver tail, but cut it into the coat, not going all the way to the bottom – similar to how I did for her daughter Misty’s coat.

Here are some more visuals of these simple Ne-Sew coats, including this template you can print out to use at home. I hesitated and then had a very hard time with the measurements for that template – as I really did trim and alter each coat so much, but I think it’s a good starting point. And if you can’t print anything out, you really can just measure out rectangles with the measurements and determine arm and tail hole locations by fitting it around a Little in need of some warmth.


Much thanks to Romeo Margeurite and Misty Waters for their modeling assitance. You can also see that I added a snap closure with a decorative button outside to Misty’s pink coat. Tiny bits of velcro could work too.


The babies could not be left out. Their coats are obviously the smallest. Pictured are Coral Babblebrook’s and Bucky Water’s coats. Both stayed closed on their own, better when their arms were down, but generally okay. I added the simple yarn scarf over Coral’s mostly for fun – and added warmth of course. Bucky is a tough little beaver and it was hard enough to get him to wear a coat he didn’t think he needed. His coat has more of a collar, so you can see that his arm holes are lower down from the top. Coral’s had no collar and so the arm holes are quite close to the top of the felt. These are both for standing babies, I did make one for little Remy Applewood before he was able to stand, and his was about 2/3 this length – so for sitting babies just make it a tad shorter.


Here is a run down of the starting measurements that I used as a base, also what I put on the template:

Adult Coat: 4 3/4 x 2 1/4 inches or 12 x 5 1/2 centimeters

Child Coat: 4 1/4 x 1 3/4 inches or 11 x 4 1/2 centimeters

Baby Coat: 3 x 1 inch or 8 x 2.5 centimeters


As an added bonus and helpful idea – I was gifted this darling set by my daughter for Christmas, after I’d done all my bundling of my cold Littles. But just LOOK at how they cross the scarf! Isn’t that brilliant? Lies so much flatter and better looking than my knotting or mini-versions of how we humans do our scarves. Will certainly be incorporating this idea into future winterizing of Littles!


I hope my simple No-Sew ideas are helpful for you and your Littles this winter. Stay tuned as I do break out my needle and thread and attempt some other coat styles. How do you keep your Littles warm? I hope you and yours had a festive end to 2023 and are entering this new year full of Peace and and Joy.

Town Center

Walking for Christmas


Little Remy Applewood had a very eventful visit to the Faunavale Christmas Market. The Applewood family’s littlest member has always been sitting through his life – watching from the sidelines quite happily. I’m guessing you have some Sylvanian babies who only sit, or maybe only crawl – they can still be happy, active family members, obviously, but also, obviously, rather limited in their physical abilities. I was starting to be sad about Remy, and wishing he could stand, run, walk about on his own – and suspecting he was feeling the same way. And so I did some research and discovered that others have had the same thoughts…. and that there is a sort of solution.

I had a lot of misgivings and was honestly rather scared – but was greatly relieved by the number of online associates (ah, thank you FaceBook Group members!) who had done this often and successfully. Done what, you ask? By applying light and direct heat, you can soften the plastic enough to, um, take off Sylvanian’s heads and well, swap their bodies. It sounds awful, and both my husband and son keep calling me Sid (Toy Story reference!), but both my critters are fine and I now have an always sitting squirrel and little Remy is able to stand!


How To Switch Baby Heads:

Briefly, you need two critters with fur color as similar as possible. It was also stated by those same online associates that the very newest babies have a new design and this will not work with critters created from 2021 on – mine are both older. I used long tweezers to hold one by the body, while aiming a hair dryer at them, turning to get all sides. Testing the squishability until they were soft enough to carefully squeeze the head and pull off from the body. They cool down quickly, so I needed to heat up the heads again to apply them to the new body of choice.

Sorry for the lack of photos ‘in process’. I was rather nervous, performed the operation in my bathroom and also did not want to dwell on their in-between state very long! I am NOT like Sid. But I AM happy to have a little Remy who can be up and about… though his parents are already having second thoughts…


Remy really wanted a closer look at that red truck from the toy booth at the Christmas Market. His dad got distracted by picking out the best looking cookie, and his mom was trying to decide if she needed a poinsettia plant. Remy saw his chance to act, er, I mean, he decided not to bother them and investigate the truck all on his own.


“Minnie, Minnie – look at our boy!” Michael Applewood excitedly got his wife’s attention after seeing Remy out of the corner of his eye. They both looked on in happy shock as their little son let go and toddled from his stroller toward the bright red truck.

They yelled for their daughter Geri, who’d was nearby and dressed up for the children’s Christmas Concert. After much laughing, hugging and exclaiming over what a Big Boy Remy was now, it was agreed he could keep the special red truck.


Such a momentous event, and at such a special time of year. Minerva and Michael are so proud of their little Remy, while also having a discussion about needing to keep a better eye on him in the future!


In the Garden

Dragons in the Garden?!

Do you have a sibling that enjoys playing pranks? Or maybe a parent? Poor Serena Margeurite has both – her father and her brother are both big pranksters. Well, her brother most likely inherited the disposition from his father, or he just watched and learned really well. Either way, it tends to create extra drama in Serena’s life that she’d often rather not have. And many fun laughs too, if she thought about it fairly. The drama usually begins innocently enough. Such as the day Serena and her good friend Rose Walnut were looking through a new book on plants and flowers and discussing what an odd name ‘snapdragon’ was for a flower.


“It says here it got the name because if you squeeze the bloom just so it can open and look like a dragon’s mouth… isn’t that funny?” said Rose.

“I don’t know,” replied Serena, “just looking like a dragon still seems concerning… I’m not sure I want to see any for real!”

That was all it took to give Romeo an idea for a prank, because he knew where some real snapdragons were growing…


Romeo needed a partner for this particular prank, and Ralph Walnut was easily persuaded, especially as it would involve his older sister Rose. Ralph didn’t have Romeo’s talent for thinking up pranks, but he did enjoy a good one now and then. As siblings go his sister was okay, but also as siblings go she could sometimes be annoying. The perfect timing came about a week later, as all four were on a hike and Romeo had easily steered them toward the snapdragons. Leaving the girls investigating some other flowers, he pulled Ralph around a bend and explained the upcoming hoax.


“Help! Help!! Dragon…. it’s a dragon!! Ahhh!!!”

Serena and Rose ran toward the screams of their brothers, not fully registering what they were saying, just thinking they were in danger, or hurt, or something. They rounded the corner, and there, in front of them – their brothers were being pulled back, struggling against something grabbing them from behind! Why, it had Romeo’s ears in it’s mouth – it couldn’t be? Could it?


“A dragon! It’s a dragon!! A dragon is eating Romeo!!”

“Ahhh!! Dragon! We need the police!! Help!!”

Both girls began screaming at once, and turned and ran back the way they’d come, screaming and running, running and screaming.


Romeo had not expected such a fantastic reaction to this particular prank. Wow. He’d hoped, but not really expected. He and Ralph looked at each other and burst out laughing, falling back into the innocent, and certainly not dangerous, snapdragons. Over their laughing they could just make out their sisters’ yells for the police, which sent them to laughing even harder.


There were many stern adults who gave correction and warned the boys against scaring people for fun, using words like ‘trauma’, ‘crying wolf’ and just ‘mean’. Landon Margeurite had to keep looking away to hide his own laughing eyes and the bit of pride he felt for his son following in his footsteps so well. Both boys did appologise to their understandably upset siblings. After all that, the joke that would remain from this prank for many years to come was the lesson that when you’re in dager from a dragon, you really need to seek out a knight, not a policeman. Both girls did eventually recover from their offence enough to agree that it really had made no sense for them to yell for the police. Laughing, they would admit that if it really had been a dragon, the obvious help was a knight in full armour. It speaks volumes that Serena could laugh at herself. Her laughter brought more of that pride to Landon’s eyes. She was also her father’s daughter to some degree, afterall.